 Save
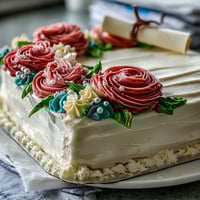
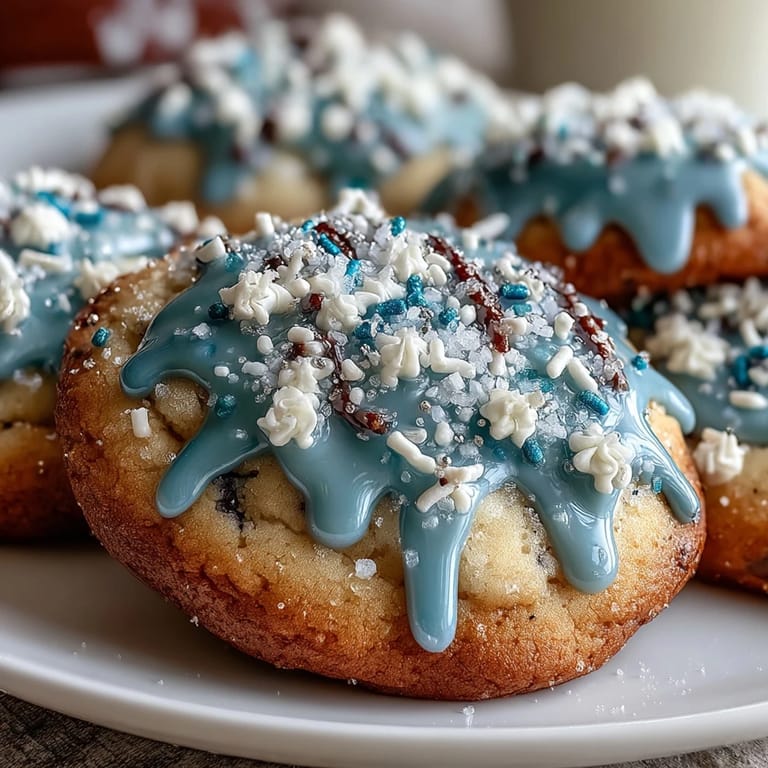
Save My niece stood on a stool in my kitchen, eyes wide as she watched me frost her first batch of cookies, and asked if they looked like Pure Vanilla Cookie from her favorite game. That question sparked an obsession in our household—suddenly every birthday party, holiday gathering, and random Tuesday needed these elegant sugar cookies with their glossy royal icing finish. The blue and white color scheme became our signature, and I've since made these dozens of times, each batch teaching me something new about patience, precision, and why soft butter really does matter.
I'll never forget the moment my coworker bit into one of these at our office party and immediately asked for the recipe, then came back the next day asking why hers didn't turn out the same. We discovered she'd used cold butter straight from the fridge, wondering why her mixer was struggling. That single conversation changed how I teach people to bake—now I always lead with the unglamorous stuff like softened butter and proper chilling time, because those details create the magic.
Ingredients
- All-purpose flour (2 1/2 cups): Measure by spooning into your measuring cup, not scooping directly from the bag, because scooping packs the flour and throws off your whole ratio—learned this the hard way when my first batch spread too thin.
- Baking powder (1/2 tsp): This gives the cookies a subtle lift and delicate crumb, keeping them tender rather than dense.
- Salt (1/4 tsp): Seems tiny, but it brightens the vanilla and prevents these from tasting one-dimensional.
- Unsalted butter (3/4 cup), softened: Room temperature butter creams properly with the sugar, trapping air bubbles that make cookies light and cakey; cold butter will fight your mixer and leave you frustrated.
- Granulated sugar (1 cup): Don't substitute brown sugar here—it changes the texture and darkens your beautiful cookies.
- Large egg (1): Room temperature eggs blend seamlessly; a cold egg can curdle your mixture and break the emulsion.
- Pure vanilla extract (2 tsp plus 1/2 tsp for icing): This is where you splurge on quality—imitation extract tastes thin and flat compared to the real thing, and it's the star of this recipe.
- Milk (1 tbsp): Just a touch to loosen the dough slightly so it rolls without cracking.
- Powdered sugar (2 cups), sifted: Sifting removes lumps that would make your icing grainy and uneven.
- Meringue powder (2 tbsp): This stabilizes the icing so it sets hard without needing to sit overnight; regular royal icing made with just egg whites takes forever.
- Warm water (4-5 tbsp): Start with less and add gradually—icing consistency is personal, and too-wet icing bleeds into itself when piped.
- Gel food coloring (optional): Gel doesn't thin your icing like liquid food coloring does, so your decorations stay vibrant and glossy.
Tired of Takeout? 🥡
Get 10 meals you can make faster than delivery arrives. Seriously.
One email. No spam. Unsubscribe anytime.
Instructions
- Make the dry mixture:
- In a medium bowl, whisk together your flour, baking powder, and salt until they're evenly distributed—this is your foundation, so don't skip the whisking. Set aside while you work on the wet ingredients.
- Cream butter and sugar:
- Beat softened butter and granulated sugar for 2 to 3 minutes until the mixture turns pale and fluffy, which means you've incorporated air and created the texture foundation for tender cookies. Stop and scrape down the bowl halfway through so everything creams evenly.
- Add the wet ingredients:
- Drop in your egg, vanilla extract, and milk, mixing until everything comes together into a smooth, homogeneous mixture—don't overmix or you'll develop gluten and toughen the dough. This should take about a minute.
- Combine wet and dry:
- Add your flour mixture gradually to the wet ingredients, stirring just until the dough comes together—stop as soon as you don't see dry streaks anymore. Overmixing here is the enemy of tender cookies.
- Chill the dough:
- Divide the dough in half, flatten each piece into a disk, wrap in plastic wrap, and refrigerate for at least 1 hour—cold dough is forgiving dough that won't spread all over your pan. This is the perfect time to make tea or do something else entirely.
- Preheat and prepare:
- Set your oven to 350°F and line your baking sheets with parchment paper while the oven comes to temperature. Parchment guarantees even browning and makes cleanup almost nonexistent.
- Roll and cut:
- On a lightly floured surface, roll one disk of dough to 1/4-inch thickness—use a ruler or measuring tape if you're uncertain, since consistent thickness means even baking. Cut shapes with cookie cutters and transfer them to your prepared baking sheets, spacing them about 1 inch apart.
- Bake with patience:
- Bake for 10 to 12 minutes, watching for the edges to turn barely golden—the centers should still look slightly underbaked because they continue cooking on the hot pan after you remove them. Overbaked cookies taste dry and bitter, so trust your instincts rather than the clock.
- Cool strategically:
- Let cookies sit on the baking sheet for 5 minutes so they firm up, then transfer them to a wire rack to cool completely—this prevents them from steaming and becoming soft. Completely cooled cookies prevent icing from melting.
- Make royal icing:
- In a large bowl, combine sifted powdered sugar, meringue powder, vanilla, and 4 tablespoons of warm water, then beat on low speed until the mixture turns smooth and glossy. Add water one teaspoon at a time until you reach the consistency you want—it should be thick enough to hold a peak but still pipe smoothly.
- Color and decorate:
- Divide icing into bowls and tint each with gel coloring, then fill piping bags or squeeze bottles for decorating your cooled cookies. Work in whatever pattern feels right, knowing that royal icing is forgiving and mistakes look intentional once it dries.
- Set and store:
- Allow icing to set completely—usually 2 to 4 hours—before stacking or storing cookies in an airtight container at room temperature for up to a week. Set cookies make the perfect gift because they're sturdy and beautiful.
 Save
Save These cookies became something bigger than just dessert the moment my niece took a photo of them for her gaming group, and suddenly three different people were asking me to make them for their events. Now they're the one thing I can reliably make that makes people feel special without any pretension—they taste homemade, look elegant, and spark conversations about flavors and colors rather than complicated techniques.
The Magic of Vanilla in Every Bite
Pure vanilla extract tastes like comfort and warmth, but only when you buy the real thing and use enough of it—this recipe calls for three teaspoons total across the dough and icing, which might seem like a lot until you taste the sophisticated result. I tried economizing once with cheaper vanilla and the cookies tasted generic, so now I splurge on one good bottle and use it freely, because vanilla is the whole point here.
Rolling, Cutting, and Staying Sane
The rolling process feels delicate but it's actually forgiving once you understand that cold dough is your friend—if your dough warms up and gets sticky, just pop it back in the fridge for 10 minutes. I used to fight with warm dough, pressing and pressing until it started tearing, until I learned that patience and cold dough take the stress completely out of this step.
Icing Secrets and Royal Transformation
Royal icing sounds intimidating but it's honestly the part that converted me from regular baker to someone who actually enjoys decorating—once it hardens, it looks professional and polished even if your piping isn't perfect. The meringue powder version dries faster and harder than traditional recipes, which means you can handle cookies within hours rather than waiting overnight. For the Pure Vanilla Cookie theme, blue and white icing with tiny gold accents creates something that looks almost stained-glass in the light.
- Start with meringue powder royal icing if you're new to decorating, because it's more forgiving than egg white versions and you don't have to worry about food safety issues.
- Gel food coloring beats liquid coloring every single time because it doesn't water down your icing or make colors pastel when you want them vibrant.
- If your icing is too thick while decorating, add water one teaspoon at a time—too thin is harder to fix than too thick.
 Save
Save These cookies have become my answer to practically every celebration, because they work for themed parties, professional gift-giving, and quiet moments when you just want something beautiful and delicious. Make them once and you'll understand why they deserve a permanent spot in your baking rotation.
Recipe FAQs
- → How do I achieve the best texture for these sugar cookies?
Chilling the dough for at least an hour helps firm it up, making it easier to roll and cutting sharper edges. Baking until the edges just turn golden ensures a tender yet firm bite.
- → What is royal icing and how is it made glossy?
Royal icing is made from powdered sugar, meringue powder, vanilla, and water. Beating it on low speed until smooth and adding water gradually achieves a glossy, pipeable consistency.
- → Can I customize the icing colors?
Yes, gel food coloring can be added to the royal icing to create vibrant colors like blue, yellow, and white, perfect for decorative themes.
- → What tools are recommended for decorating the cookies?
Using piping bags or squeeze bottles allows precise control when applying royal icing for detailed and clean decorations.
- → How should these cookies be stored to maintain freshness?
Store fully iced cookies in an airtight container at room temperature for up to one week, ensuring the icing remains firm and cookies stay soft.